Playful Cat Basket
- Nov 27, 2022
- 4 min read
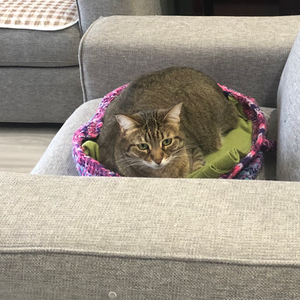
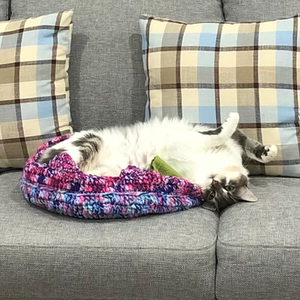
This cat-shaped basket is soft, warm, and basically a perfect napping haven for your kitty. The best part is that it's extremely versatile, so you can easily modify it to suit your needs! For example, if you want to make one for your canine friend, just crochet dog ears instead of cat ears and adjust the size as needed. If you'd like a "normal" (e.g.: no animal shapes) basket to use for storage at home, simply skip the ears & tail and adjust the size. I'm so happy with how this turned out, and it seems like my family's cats are too; just look at them!


Materials:
2 strands of medium (#4) or 1 strand of bulky (#5) yarn
Size M/N (9mm) hook
Yarn needle
Scissors
Stitch markers
Measurements:
16" diameter x 3" height (excluding ears)
Gauge:
3" square = 8 stitches x 3.5 rows in dc
Stitches & Abbreviations:
ch = chain
sl st = slip stitch
dc = double crochet
BLO = back loop only
sc = single crochet
sc2tog = single crochet 2 together
hdc = half double crochet
st(s) = stitch(es)
Notes:
-This pattern is written in US crochet terms.
-If using medium (#4) yarn, hold 2 strands together throughout. If using bulky (#5) yarn, crochet with 1 strand as normal.
-Turning ch-2 counts as 1 dc, so joining sl st should be made in top of beginning ch-2.
-Sl st to join at end of round does not count as a stitch.
-To make the basket larger/smaller, add/subtract rounds when creating the base, making sure to increase by 12 sts with each additional round.
-Similarly, to make the basket taller/shorter, simply add/subtract rounds (starting from R14) when creating the sides. R12-13 of the sides are crucial to give your basket a stable base.
Pattern
Base:
Keep sts relaxed.
Foundation: Make a slip knot, ch 5, 1 sl st in 1st ch to form a ring
R1: Ch 2, 11 dc in center of ring, 1 sl st to join (12)
R2: Ch 2, 1 dc in same st, 2 dc in next 11 sts, 1 sl st to join (24)
R3: Ch 2, 1 dc in same st, 1 dc in next st, (2 dc in next st, 1 dc in next st)*11, 1 sl st to join (36)
R4: Ch 2, 1 dc in same st, 1 dc in next 2 sts, (2 dc in next st, 1 dc in next 2 sts)*11, 1 sl st to join (48)
R5: Ch 2, 1 dc in same st, 1 dc in next 3 sts, (2 dc in next st, 1 dc in next 3 sts)*11, 1 sl st to join (60)
R6: Ch 2, 1 dc in same st, 1 dc in next 4 sts, (2 dc in next st, 1 dc in next 4 sts)*11, 1 sl st to join (72)
R7: Ch 2, 1 dc in same st, 1 dc in next 5 sts, (2 dc in next st, 1 dc in next 5 sts)*11, 1 sl st to join (84)
R8: Ch 2, 1 dc in same st, 1 dc in next 6 sts, (2 dc in next st, 1 dc in next 6 sts)*11, 1 sl st to join (96)
R9: Ch 2, 1 dc in same st, 1 dc in next 7 sts, (2 dc in next st, 1 dc in next 7 sts)*11, 1 sl st to join (108)
R10: Ch 2, 1 dc in same st, 1 dc in next 8 sts, (2 dc in next st, 1 dc in next 8 sts)*11, 1 sl st to join (120)
R11: Ch 2, 1 dc in same st, 1 dc in next 9 sts, (2 dc in next st, 1 dc in next 9 sts)*11, 1 sl st to join (132)
Sides:
Keep sts tight.
R12: Ch 1, 1 sl st BLO in each st, 1 sl st to join (132)
R13: Ch 1, 1 sc BLO in each st of R11 (insert hook in same sts as R12, effectively covering sl sts from R12), 1 sl st in 1st sc of this round to join (132)
R14-15: Ch 2, 1 dc in each st, 1 sl st to join (132)
If you're making cat ears and a tail for your basket, proceed with the instructions below. If not, then make your final row, keeping sts relaxed, with 1 sl st in each st, 1 sl st in first st to join. Fasten off, weave in all ends, and you're done!
Cat Ear 1:
R16: Ch 1, 1 sc in next 10 sts, ch 1, turn (10)
R17: 1 sc2tog, 1 sc in next 6 sts, 1 sc2tog, ch 1, turn (8)
R18: 1 sc2tog, 1 sc in next 4 sts, 1 sc2tog, ch 1, turn (6)
R19: 1 sc in each st, ch 1, turn (6)
R20: 1 sc2tog, 1 sc in next 2 sts, 1 sc2tog, ch 1, turn (4)
R21: 2 sc2tog, ch 1, turn (2)
R22: 1 sc in each st, ch 1, turn (2)
R23: 1 sc2tog (1)
Fasten off.
Cat Ear 2:
Insert hook in next st after end of Ear 1, secure yarn, and pull up a loop.
R16: 1 sl st in next 10 sts
Repeat R16-23 of Ear 1. Fasten off.
Top (with Cat Ears):
Insert hook in next st after end of Ear 2, secure yarn, and pull up a loop. Keep sts relaxed.
R16: 1 sl st in each st, 1 sl st in first st to join
Fasten off.

Finished Top with Cat Ears
Cat Tail:
Foundation: Make a slip knot, leaving a 2” tail, then ch 11
R1: 1 hdc in 2nd ch from hook and each ch (10)
Fasten off. Using the 2” yarn tail, sew the cat tail to the basket. Weave in all ends, and you're done!

Finished Basket with Cat Ears & Tail
Did you like this pattern? Let me know if you have any questions or comments down below!

Comments